In the 17th and 18th centuries, printers frequently published inexpensive editions of popular books. These "mass-market" editions, called "stitch books", had no covers and no elaborate bindings; the quires (groups of pages) were simply stitched together from front to back with coarse thread or light string. I learned this binding method from the printer's shop at Colonial Williamsburg, where they print facsimile editions of Colonial books and bind them in this fashion before offering the books for sale to visitors.
Print the PDF file to double-sided pages, preferably by using an automatic duplexer. If you do not have a duplexer, the sheets may be duplexed manually, either by feeding the sheets one by one (printing one page on each side), or by printing all the odd pages and then printing the even pages on the backs. If an automatic duplexer is used, select "short-edge duplexing".
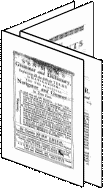
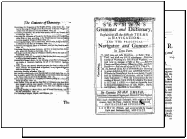
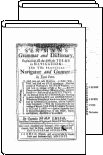
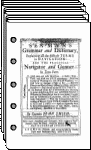
Fold the pages into quires of two sheets each, which (when folded) will produce groups of eight pages. In most cases, there should be a letter (or a letter followed by the number 2) on the first and third pages of the quire, identifying the collating order. There will also usually be a "catchword" in the lower right-hand corner of each page, showing what the first word of the next page will be. [illustration] Please be aware that there are no quires labeled J, V or W; furthermore, sheets A, A2 and K are unlabeled (and the label for sheet G is hiding on the bottom line between the end of the page's text and the catchword). There are also a couple of spurious "3" labels on the fifth page of some of the quires. Ignore these. The only quire that consists of anything other than two sheets is the final one, Z, which is only one sheet (four pages).
There is also an extra sheet at the end, with an illustration of a vessel on one side, and labels for the illustration on the other. Cut off a strip at the edge of the sheet (it is marked on the side with the illustration), and fold inwards at the dotted line (also on the illustration side). Place this sheet between the pages numbered 18 and 19 (in quire D), with the bulk of the text facing page 18. Then gather the quires together and align their edges as well as you can.
With the pages aligned, punch or drill 5 equidistant holes, vertically centered, along the right edge. (Make them smaller than shown here; the holes in the illustration are enlarged for emphasis.) The holes should only be large enough to permit the binding string to pass through them at most twice.
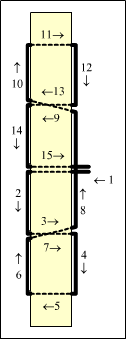
Take a sturdy string for binding, and thread it on a needle large enough to accommodate it. Decide whether you want the knot to be on the front or the back of the book; this side will be referred to as the "front" in this description, even if it's the back page of the book. Begin by pushing the string through the center hole, from the front to the back, leaving enough string in front so that you can tie a knot with it when finished. Pull the string back through to the front through the hole below the center. Push the string through to the back, through the bottom hole. Pull through to the front, through the hole you used previously (between the middle and bottom holes. Skip the middle hole and push the string through to the back through the hole between the top and middle holes. Pull the string through to the front through the top hole. Push through to the back using the previous hole (between the top and middle holes). Finally, come back through to the front using the middle hole.
You should now have two ends of the binding string hanging out the front of the middle hole, and one string that goes across the hole in the front. Make sure one end is on each side of the transverse string, and tie a knot in the two ends. Make the knot as secure as you can, then pull it to one side (so that there is solid paper underneath it) and strike it with a hammer. Trim the ends. If you're really paranoid about the knot coming undone, you can apply a drop of glue or some other fixative to the knot.